Disclaimer: This post includes affiliate links that I may get compensation from if you decide to make a purchase. Thank you for the support!

Monday Makings and Pattern Reviews….

What a fun last week!!!  I released my latest Free Crochet Pattern… Winter’s Twist Headband,,, The Crochet-A-Long is going fantastic,,, lots of great projects shared on Facebook last Friday on Show and Tell!!!  My Sunburst Granny is now all most done… Squares are completed and joined,,, Now just for the edging!!  And, I made 3 more hats for our upcoming charity drive at ELK Studio From The Heart…  Wow… Now that’s alot of crochet!!

So here are some pictures and then… Reviews of the hats I made… Just in case you would like to make them too!!

First here is my Winter’s Twist HeadbandClick Here for the link to the Free Pattern!

Winters Twist Headband Free Pattern

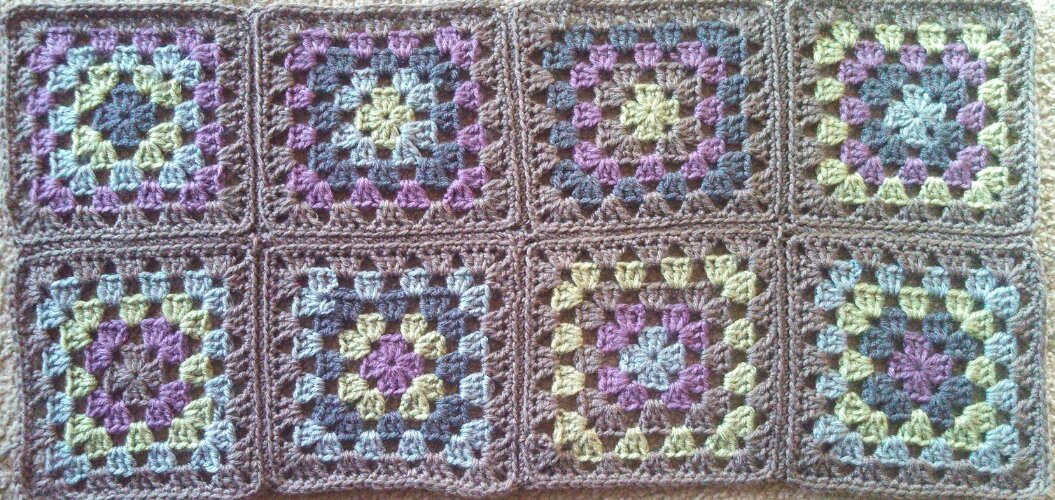
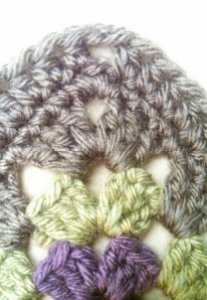
Next,,, Week 5 Crochet-A-Long… Click the tab “Crochet-A-Long at the top of the page to get going on this great afghan!!

week 5


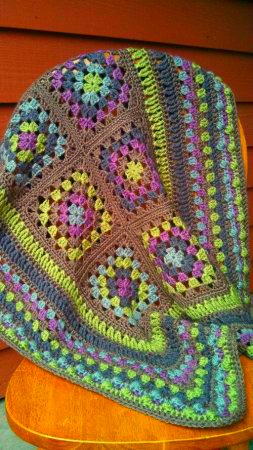
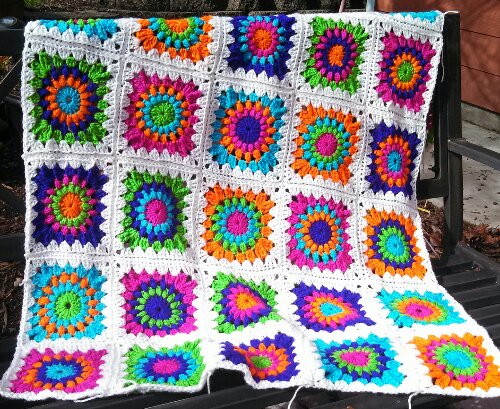
And here is how my Sunburst Granny Square Blanket is coming along… All that’s left is the edging… I hope to finish that up by tonight!!

wpid-IMG_20140216_121046_628-1.jpg

Now on the the reviews…

The first  hat is from ELK Studio Handcrafted Crochet Designs… This is Kathy’s Country Appeal Hat… This is a Free Pattern!  As usual, this pattern is easy to read and can be made in one evening…  Kathy is quite the hat designer and as you know,,, I have made several of her wonderful patterns… This hat is one of my favorites!!  The texture she designed makes this very cozy and comfortable to wear!  It is worked from the bottom up to assure a great fit!!  So if you would like to make this Country Appeal Hat, Click Here
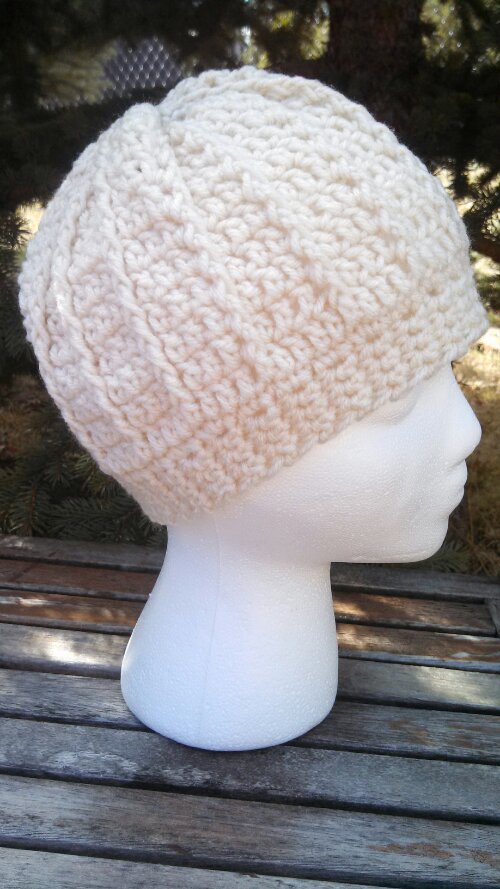
 

wpid-IMG_20140216_115750_374.jpg

Country Appeal Hat

The Second Hat I made is the Surface Braid Hat by The Laughing Willow…  To make this hat, Click Here for the Free Pattern… I have wanted to make this style of hat for a while and just found this pattern recently!!  It is a great technique to get the fun effect on the right side of the hat… This technique makes the hat very stretchy and plush!!!  I actually ended up making two… I need to send off at least 4 hats to the charity… so now I am ready… I have these 3 hats and one from last weeks review.
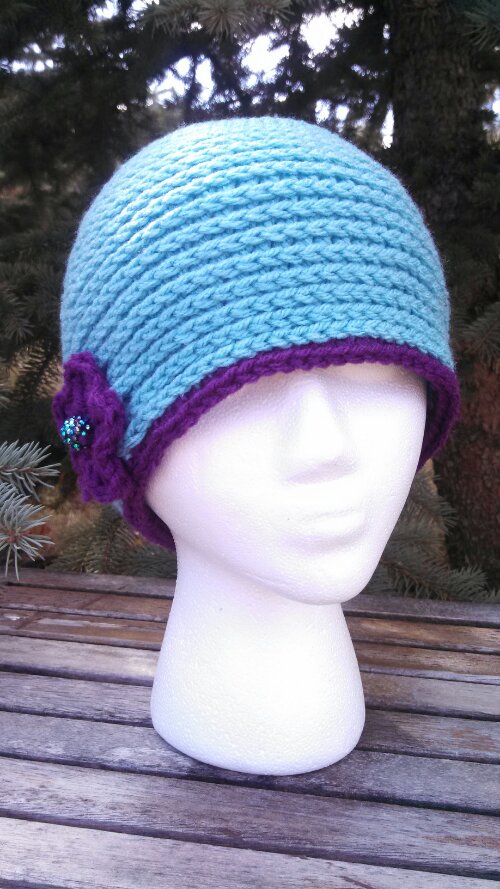
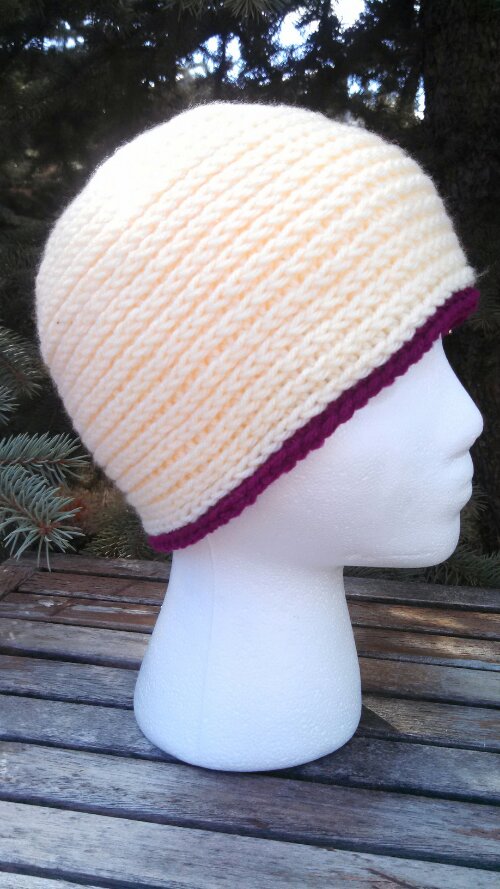
wpid-IMG_20140216_115602_460.jpg       wpid-IMG_20140216_115638_334.jpg

Flat Braid Hat

.

I hope you had a great Crochet Week!!!

Happy Crocheting!!


Monday Makings… Life in the Crochet Lane!!!

I absolutely love to crochet!!!  If a day goes by without a hook in my hand… I feel sort of lost!  So many of us talk about all our projects we are working on and how many we have stashed away… I am the Queen of that!!   I thought I would take a moment to see if I could check some of those off my list this weekend…  And the big answer was NO… I just decided to add more to my list…. Love to Crochet!!!

.

wpid-IMG_20140202_130455_095.jpg

The beginnings of my newest,,, Bright Sunburst Granny Afghan…

.

wpid-IMG_20140202_192600_080-1.jpg

All the centers complete and most of the Third rounds are done…


wpid-IMG_20140202_194036_285.jpg

The final size of the Sunburst Granny Block…

.

So why start another Afghan while working on our CAL???  Yep that’s what I said to myself…   I  am donating  this Beautiful Bright Sunburst Granny Afghan to a Fundraiser… It has to be done in just a couple of weeks… So I had to get busy!!!

If you remember from last year… I made a Beautiful Cream and Scrap Sunburst Granny… I loved it so  much that I thought I would make another!!!  This pattern is from Priscillas Crochet… You can Click Here to get her Free Pattern!!

.

phone 119

Beautiful Cream and  Scrap Sunburst Granny from Last Year….

.

Also this weekend~I worked on our CAL pattern… So much fun… I hope you are making it with me…  If you haven’t started the CAL,,, It’s not to late to join in the fun…Week 1-3 are easy and you could catch up before we get to week 4… Lots of fun and lots of great stitching!!!

.

Wk 3 corner

A corner of my Week 3 CAL Afghan… So in love with Vanna’s Choice Yarn by Lion Brand!!!

Happy Crocheting!!

Elena

Beatrice Ryan Designs Crochet A Long Afghan.. Week 2

I hope you had a great week and had fun crocheting your Granny Squares…  Are you ready to put them together and move on to the next step??

There are two methods frequently used to join Granny Squares… You can whip stitch them together or crochet them together… Since I am a total crochet-a-holic and not so much a seamstress… I always have crocheted mine together… But if you prefer the look of the stitching method that will be great too… I found 2 great tutorials for these methods incase you haven’t joined Granny Squares together before…

.
The first method is Crocheting Granny Squares together. This tutorial is by one of my favorite Crochet Artists… Lucy from Attic 24… She is famous for her colorful Granny Squares and this tutorial is very clear and it will walk you through this method if this is the one you  would like to use!!!  Click Here for the Crocheting Granny Squares Together Method…

The second method is to Sew the Granny Squares together. I found a great tutorial from Lion Brand Yarn to demonstrate this method… Click Here for the tutorial on How to Invisibly Seam Granny Squares Together Method…

Stitches:

Sl St – Slip Stitch     Ch – Chain     Hdc – Half Double Crochet

Instructions for Week 2:

Join your Granny Squares together in on of the above methods.  You will join them in 2 rows of 4 squares.  See my Granny Squares below for placement.

.

wpid-IMG_20140119_145132_074-1.jpgThis is the front side of my Joined Granny Squares…

.

wpid-IMG_20140119_145445_417-1.jpg

This is the back side of my Joined Granny Squares… Notice the slight ridge the Sc joining forms… I like this for my self and over time the ridge slightly lessens as the yarn settles into place.  But, if you don’t like the ridge the whip stitch method would be a better choice for joining.

.

Step 2 – Working with neutral or main color:

*Tip 1: You will want to make sure when making row 1 & 2 that the top and bottom row have the same number of stitches and the right and left sides each have the same number of stitches. 

*Tip 2:  When working or row 1 & 2…It will be important to have an even amount of stitches on each side of your work, the exact count isn’t important,,, but the even numbering is!!  Next weeks pattern section will be thrown off if you have odd amounts of stitches…When counting your stitches,  the center stitch of the corner will not be added into your count..  You should check your stitch count at the end of each of the four sides and make sure it is an even number and that the parallel sides have the same number of stitches… This will ensure your afghan will remain in an even rectangle shape.

Row 1:      Join with Sl St in any corner.  Ch 1, 3 Sc in corner. *Sc in each stitch across to the next corner, 3 Sc in Corner*. Repeat * * Around, join with Sl St to first Sc.

Row 2:     Ch 4 (counts as Hdc plus ch 2 for corner), Sk 1 Sc, Hdc in next Sc.  *Hdc across to 1st Sc of next corner. You will skip the center Sc of previous row corner, Ch 2, Hdc in next St and each across to next corner*. Repeat * * Around, Join with Sl St to 2nd chain of beginning Ch 4. Finish off. You should have approx 44 Hdc on the sort sides of the rectangle and 94 Hdc on the long ends of the rectangle.

Below is an up close picture of the corners for reference.

wpid-IMG_20140124_214857_329-1.jpg

.

And here is a photo of week 2 completed… 8 Granny Squares joined, 1 row of Sc’s, 1 Row of Hdc’s….

wpid-IMG_20140125_120834_715-1-1.jpg

.

Congratulations… You have finished Week 2!!!  Don’t forget to hop over to Facebook next Friday for Show and Tell at 5Pm EST… and Pinterest to see what everyone has done so far!!!

Happy Crocheting… Elena

.

..

.

.

.

%d bloggers like this: