Rainbow Dash Baby Blanket
This Free Crochet Pattern is an adorable baby blanket that is bright and cheery… It can be made using one or more colors to get the effect you desire. Great texture front and back too!


If you love this blanket… Add it to your Ravelry queue and favorites… Click here!
Materials:
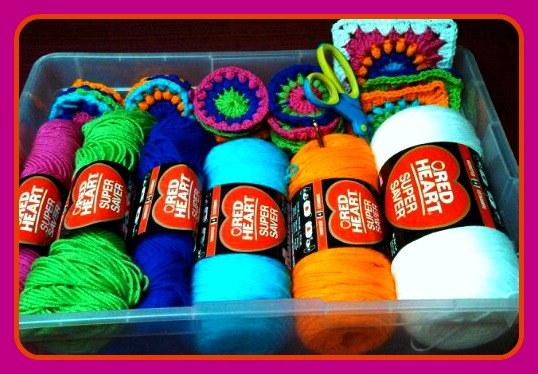
Worsted Weight Yarn ~ 1200-1800 yards. This afghan looks more amazing using 3-5 colors of yarn. In the photo shown I used Lion Brand Pound of Love Yarn in Bubble Gum, Turquoise, Honey Yellow and Lavender.
Shop for your yarn needs at Michaels Craft Store Online!! Affiliate Link
Hook ~ I
Yarn needle and scissors
Stitches:
Sl St – Slip Stitch Sc – Single Crochet Dc – Double Crochet Sk St – Skip Stitch Hdc – Half Double Crochet Trc – Triple Crochet
FPTrc – Front Post Triple Crochet~ Yarn over 2 times, insert hook around designated post starting in the front, go around the back of the stitch and around to the front of the other side of the stitch, draw up a loop. Pull through 2 loops x3.
Tips:
To get the best effect from this simple stitching, you will change color every 2 rows.
This afghan measures approx. 36″ x 38″
Instructions:
Using your first color, Ch 92
Row 1: Turn, Sc in 2nd chain from hook and each across. = 91 Sc
Row 2: Turn, Ch 3(counts as Dc now and throughout), Dc in each stitch across. = 91 Dc
Change to next color. You can carry your colors up the sides of the rows or finish them off and join as needed and weave the ends in later.
Row 3: Turn, Ch 1, Sc in 1st Dc, *FPTrc in next stitch 2 rows below(Around the Sc of Row 1 directly below, See photo tutorial), Sk St(Your FPTrc is taking up this stitch below so you need to skip this stitch to avoid extra stitches, See photo tutorial), Sc in next stitch(In top of row 3)*. Repeat * * across to end. =46 Sc & 45 FPTrc – Total 91 stitches


Row 4: Turn, Ch 3, Dc across. = 91 Dc
Change To Next Color
Row 5: Turn, Ch 1 Sc in 1st St, * FPTrc around Previous Rows FPTrc (See Photo Tutorial), Sk St, Sc in next St*, Repeat * * across. = 91 Stitches

Row 6: Turn, Ch 3, Dc across. = 91 Dc
Change to next color
Rows 7-82: Repeat rows 5 & 6 ~ 76 more times alternating colors as desired.
Edging:
Using all one color for the edging, continue using the yarn from row 82 or join new color in top right corner of blanket.
Row 1: Turn, Ch 1, Sc in 1st st and in next 89 stitches to the 1st corner, 3 Sc in corner. Working along the side edges of the rows, evenly space 123 sc’s to the next corner(this is approx 3 sc in each 2 row color segment). 3 Sc in next corner stitch. Sc 89 stitches across the bottom , 3 Sc in next corner. Working along the 2nd side of the blanket rows, Sc 123 evenly spaced to the next corner, 2 Sc in same space as beginning Sc (this equals 3 Sc in this corner). Join with Sl St to beginning Sc. = 436 Sc
Row 2: Turn, Ch 1 Sc in same St, 3 Sc in next st (this should be the corner stitch of the previous row), Sc in the next 125 stitches to the next corner. 3 Sc in corner stitch. Sc 91 Sts across, 3 Sc in next corner stitch. Sc in the next 125 stitches, 3 Sc in the next corner stitch. 90 Sc across. Join to the beginning Sc. =444 Sc
Row 3: Turn. Ch 2(Counts as Hdc now and throughout), Hdc in next 92 sts, 3 Hdc in corner, Hdc in next 127 stitches, 3 Hdc in next corner. Hdc in next 93 stitches, 3 Hdc in next corner. Hdc in next 127 stitches, 3 Hdc in corner. Join to the top of the beginning Ch 2. = 452 Hdc
Row 4: Do not turn… Sl St in next St, Ch 4(Counts as Trc now and throughout), 2 Trc in same space (1/2 Shell made). *Sk 2, Sc in next St, Sk 2 , 5 Trc in next St (Shell)* Repeat 14 more times. Sk 2, Sc in corner. Sk 1 , 5 Trc in next St,* Sk 2 Sts, Sc, Sk 2, 5 Trc in next St* Repeat * *20 more times, Sk 1 Sc in corner. Sk 2, 5 Trc in next St,* Sk 2, Sc in next St, Sk 2, 5 Trc in next St*, Repeat * * 14 more times, Sk 2, Sc in corner. Sk 1, 5 Trc in next St, *Sk 2, Sc in next St, Sk 2, 5 Trc in next St* Repeat * * 20 more times, Sk 1, Sc in last corner, 2 more Trc in same stitch as beginning 1/2 shell. Join to the top of Ch 4. = 76 Shells
Row 5: Do not Turn, Ch 1, *2Sc in each Trc, and 1 Sl St in each Sc*, Repeat * * Around. Join With Sl St to beginning, Finish off
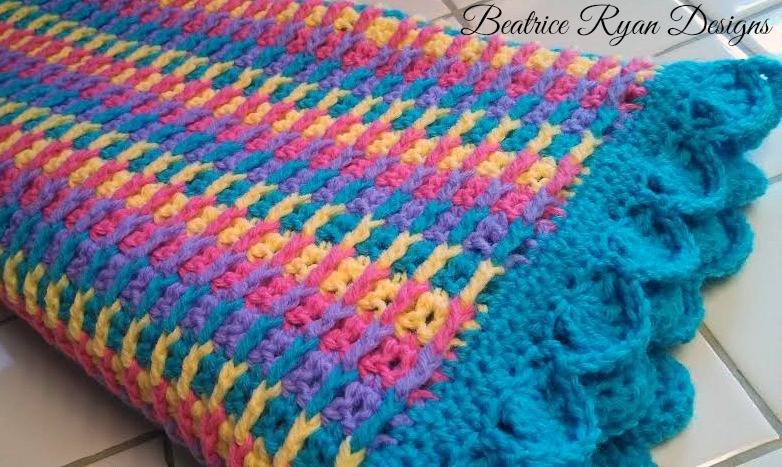
Congratulations… You now have a Rainbow Dash Baby Blanket!!
Happy Crocheting!!!
Elena
©Copyright 2016 Elena Hunt/Beatrice Ryan Designs. All of my patterns and posts are my own work. Do not copy them in any way. If you want to share this information with someone, share the link to this post. If you want to share on your own blog, website or social media, then you may use the first photo in this post and link back to this post. You may not give away printed copies of this post. Thank you. This post may contain affiliate links/ads. If you purchase something from a link in this post, I may be compensated.